Stonespine Architects - A Solo Review
22 Apr 2024
Building a dungeon is serious business. So serious in fact, that after spending years studying for it, you need to prove your mastery in a final test: building a dungeon in the Stonespine Mountains. Do you have what it takes to please Master Hortgully and earn your degree as a dungeon architect?
Name: Stonespine Architects
Designer: Jordy Adan
Publisher: Thunderworks Games
Game type: drafting, hand management, pattern building
What is Stonespine Architects?
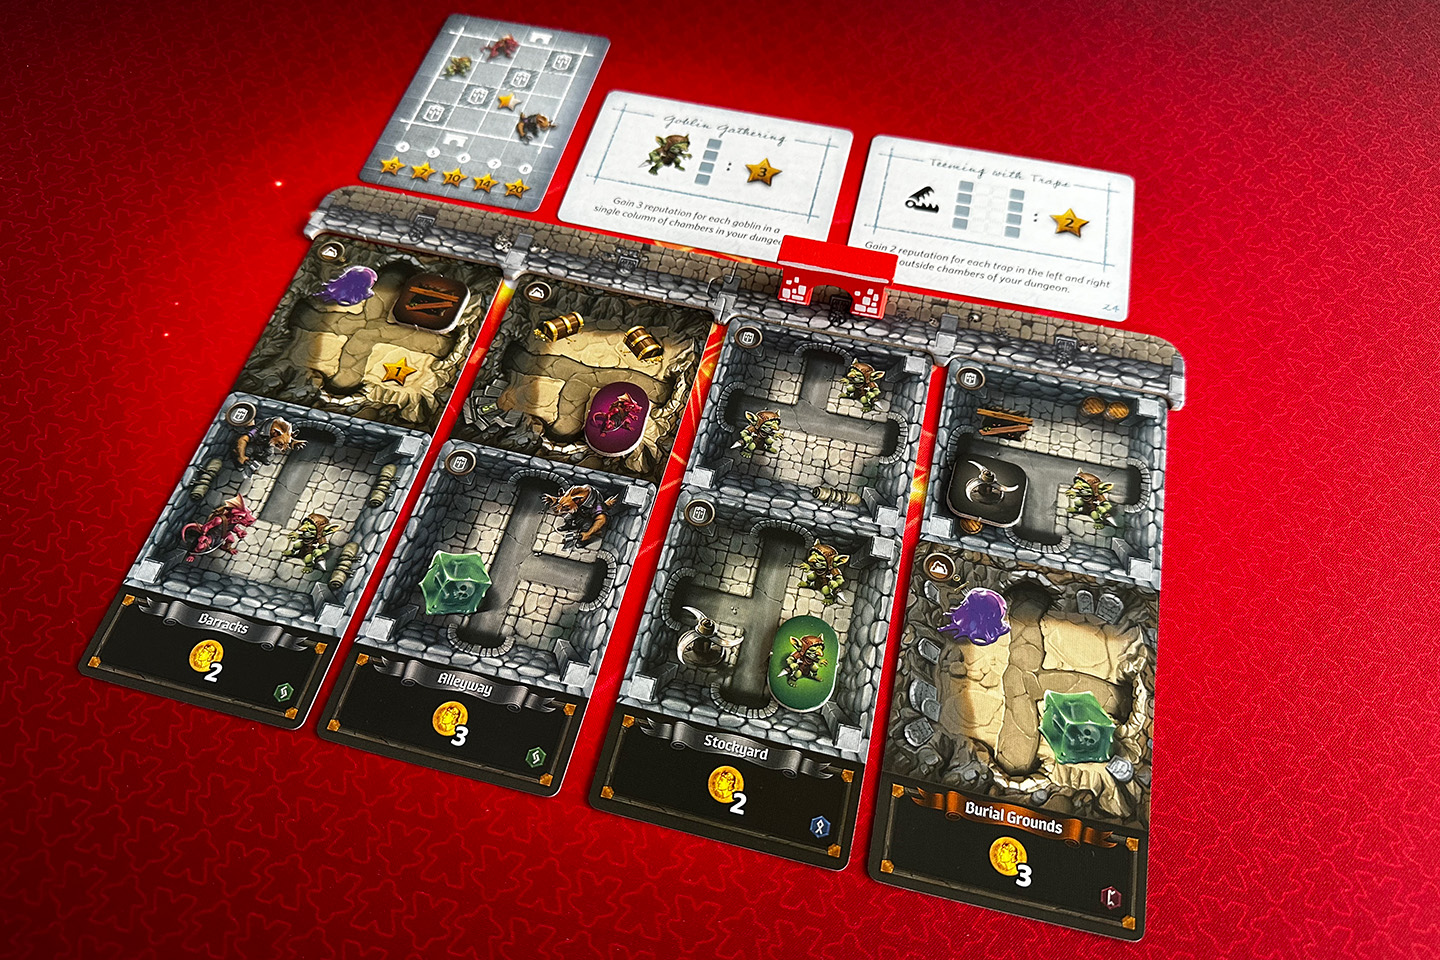
In Stonespine Architects you are trying to construct a dungeon of 16 chambers (cards) in a 4×4 grid, one row at a time, trying to meet a variety of requirements: your personal blueprint, the challenges you can pick up after each round and the overall goal set at the start of the game. In between rounds you’ll be able to purchase tokens (monsters, traps, passageways, …) to add to your dungeon’s chambers in order to help you with the blueprint, the challenges and the goal. The game ends after 4 rounds and whoever scores the most points, either you or your solo opponent called Jael, will be the winner.
How does it play?
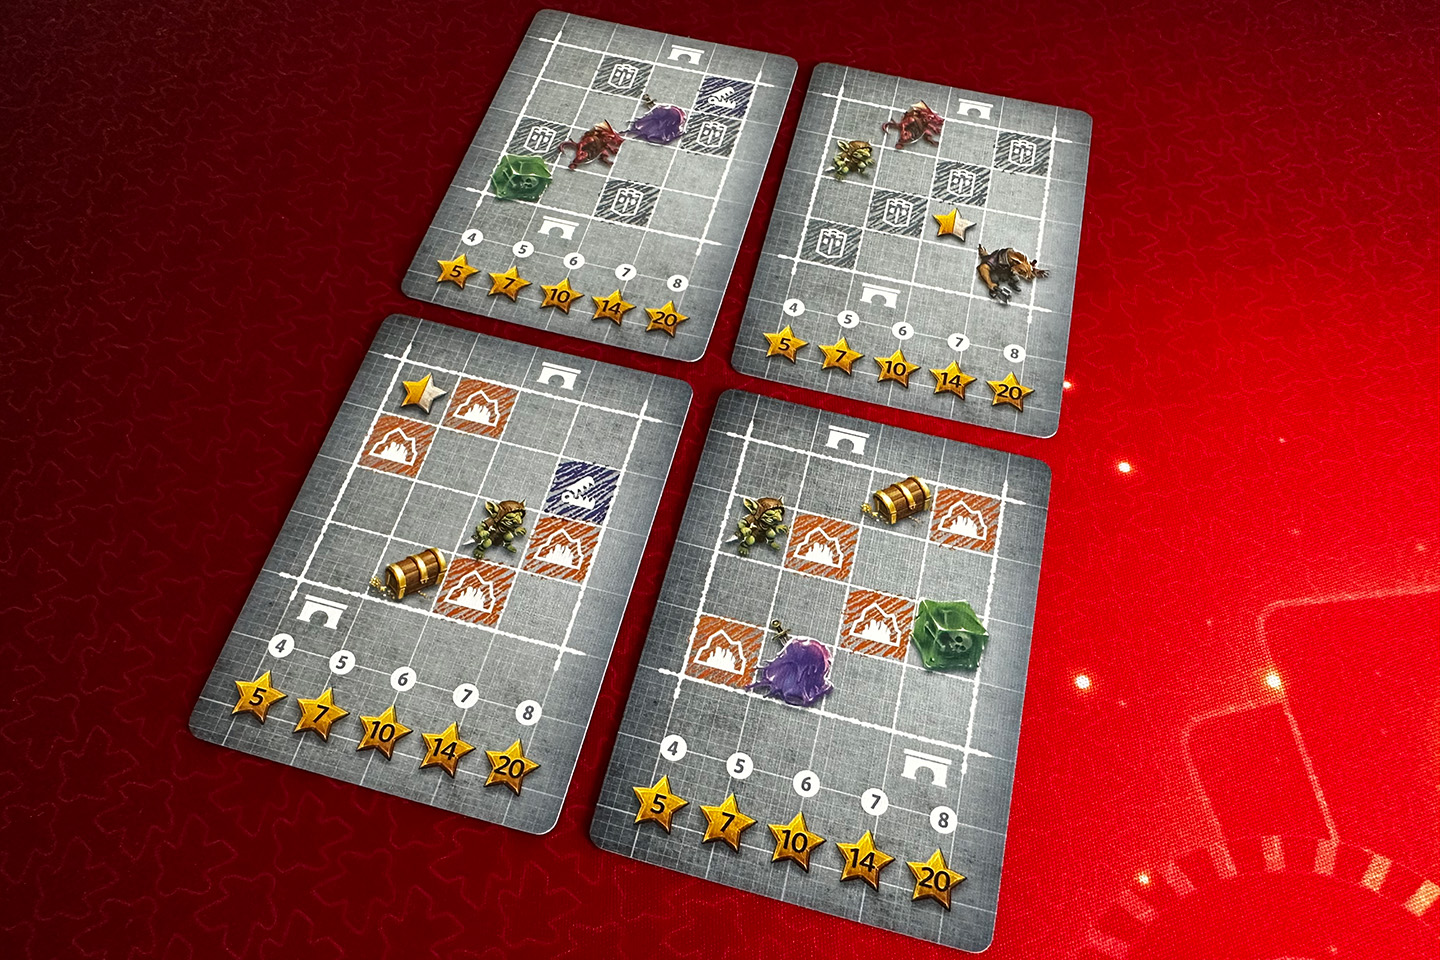
The game comes with 8 blueprints and 8 goal cards. At the start of the game you pick a random one of each.
Your blueprint gives you something personal to work towards. It shows you a grid of 4 by 4, literally the blueprint of the dungeon you’re about to build, with 8 of the 16 squares showing a requirement. Half of the requirements are about the type of chamber you need to have on that exact location (a cave or a stone chamber). The other half of the requirements are about what you need to have present in the chamber on that exact location (a trap, a specific monster, a reputation star or a treasure chest). At the end of the game you will score 5, 7, 10, 14 or 20 points if you have managed to fulfill 4, 5, 6, 7 or 8 of those requirements.
Unlike the blueprints, the goal cards are not personal. It shows something you need to have the most or the fewest of in your dungeon, something you’re competing for with Jael, the solo opponent. It might tell you for example to get the most goblins in your dungeon, or the fewest treasure chests, or the most pairs of identical traps, … The winner of the goal card will score 15 points, the other one will score 9 points.
At the start of every round there are a few things you need to do:
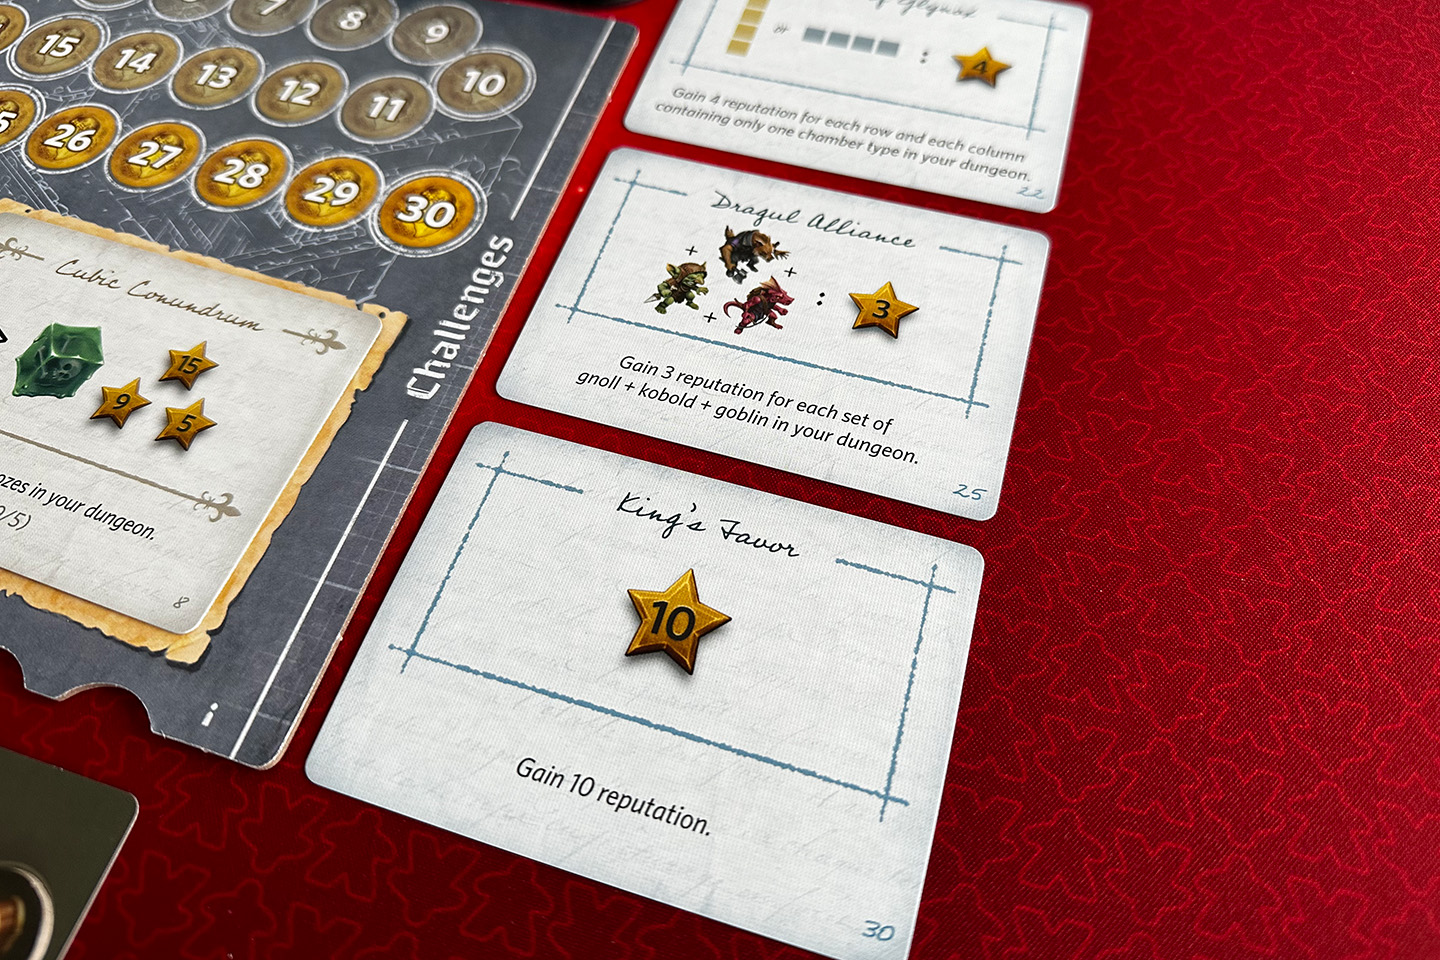
- Draw 3 challenge cards and place them face up. You’ll be able to acquire one challenge card at the end of round 1, 2 and 3. They give additional dungeon requirements that can score you points, like 3 points per pair of a gnoll and a trap, 4 points per chamber with a monster, a trap and star, 3 points for each star or treasure chest in the 4 central chambers in your dungeon, …
- Draw 2 market cards and put facedown tokens on the indicated spots on those cards. Each market card is divided into a top half and a bottom half, each half with its own gold value. At the end of the round you’ll be able to spend the gold you’ve gathered in that round to purchase tokens on the market cards.
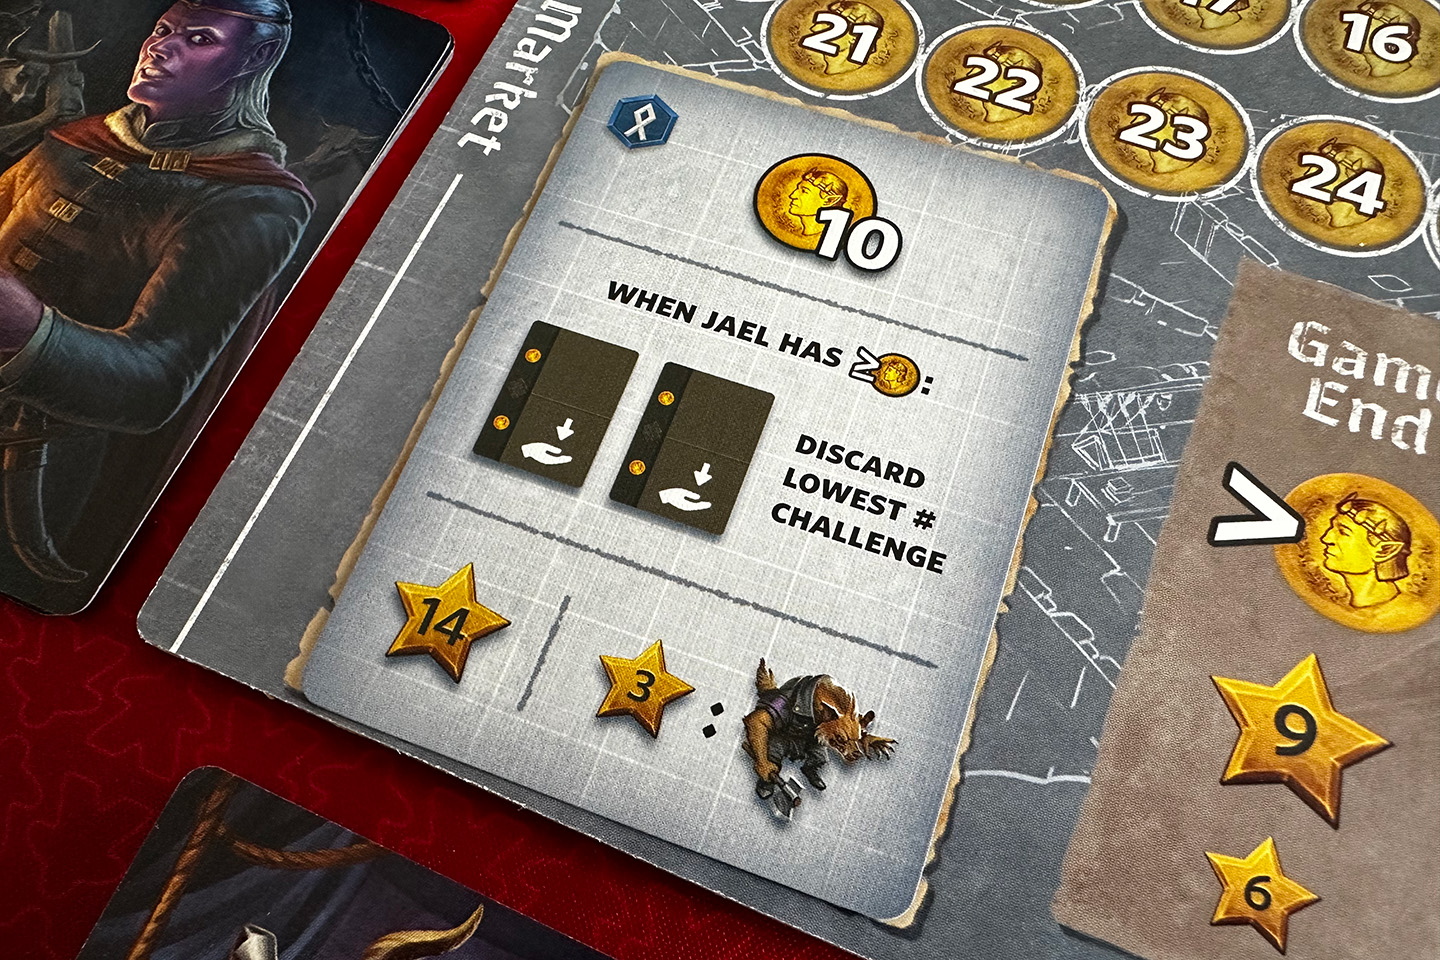
- Reveal the next Jael card. This shows how your opponent will behave this round and how they will score at the end of the game.
- Draw a starting hand of 5 chamber cards.

Now you’re ready to take 4 turns in the round. Each turn you will do the following with the cards in your hand:
- Select one of them and place it into your dungeon, into any empty spot of the current row. In the first round you will build the top row, in the second round the second row, and so on.
- Select one card you want to keep for the next turn and set it aside.
- Look at the icon on the top left of the Jael card you revealed at the start of the round. There are three possible icons: green, red and blue. Every chamber card also has such an icon on the bottom right. Give Jael all remaining cards in your hand that match the symbol on the Jael card.
- Discard any remaining cards.
- Draw one card from the stack of chamber cards for each empty spot in the current row. So at the end of the first round you will draw 3 cards because there will be 3 empty spots. Add these cards to the card you set aside in step 2.
- Go back to step 1.
The round ends when you’ve placed 4 cards and finished the row.
You now tally up the gold you’ve collected. Every card shows a gold value at the bottom. Each row slightly overlaps the row above it, so only the gold values of the row you just finished will be showing. Add up those numbers and add the number of treasure chests anywhere in your dungeon. That’s how much gold you’ll be able to spend in the market. You indicate this by placing your gold maker at the corresponding value on the game board. Next you look at the gold value on Jael card and place Jael’s gold marker on that corresponding gold value on the game board.
When you have the most gold, you can go ahead and either purchase tokens from one part of one of the market cards or pass. When you purchase tokens you immediately place each of them on an empty spot in any of the chambers of your dungeon. Each chamber has four spots. Some are empty, some have something already printed on them. These tokens help you meet the requirements of your dungeon. For example, if your blueprint requires you to have an ooze in the second chamber of your first row, but you didn’t get any chamber cards with an ooze on them during the first round, you might get lucky during a later round if you can purchase an ooze token from the market and place it on that card. A rarer type of token is a secret passageway. When you buy one of these you can place it between two chambers in order to connect them. So if the paths on the cards don’t line up, there’s a way to fix that. After you’ve purchased something, you move your gold marker a number of spaces back on the game board to keep track of your current amount of gold and you evaluate again who has the most gold.
If instead of spending gold you choose to (or have to, because you don’t have enough gold left) pass, you can take one of the challenge cards you revealed at the start of the round and move your gold marker to zero; you don’t carry over gold to the next round.
If Jael has more gold than you have, Jael takes the tokens from the locations on the market cards indicated on the Jael card. Next Jael removes the challenge card with the lowest number. Once Jael has done this, you move their gold marker to zero to indicate they have passed and are done for the round.
When both you and Jael have passed, you can move on to clean-up (give Jael all the remaining market tokens, remove the remaining challenge card and the market cards) and start the next round.
The game ends after four rounds, when you have built a dungeon of 4 rows of 4 cards. On to calculating the scores!
There are number of things that score you points:
- Final gold. At the end of the fourth round, you don’t move the gold markers to zero when you or Jael pass. Whoever has the most gold left gets 9 points, the other one gets 6 points.
- The goal card rewards 15 and 9 points, based on who did best. For Jael, you look at all the cards and tokens they’ve gathered during the game.
- For you, each of the three challenge cards and your blueprint card score you points based on how well you did. Jael doesn’t get challenge cards or a blueprint card. Instead, they score for each of the 4 Jael cards that got revealed during the game. Each of those cards shows a base score (e.g. 14 points) and a variable scoring value (e.g. 3 points per goblin on their cards and tokens).
- Count up the values in the stars, both on chambers and tokens, in your dungeon. These can be positive and negative values, so pay attention. For Jael you again look at all the cards and tokens they’ve gathered during the game.
- Finally, you look at the paths in your dungeon. Your blueprint indicates where the entrance and exit of your dungeon are located. Each chamber that is connected to the entrance scores you a point. The same goes for chambers connected to the exit. This means that chambers connected to the entrance and the exit score you 2 points.
Compare your score to Jael’s. Highest score wins!
What does it look and feel like?
Nothing but positive to say here:
- The cards have a good thickness and a nice finish. I haven’t sleeved them and I’m not planning to.
- Sturdy wooden components with nice printings on them.
- The “frames” that form the top of your dungeon make it easy to line up the cards in neat columns.
- The art is of course subjective, but I like it a lot. If you’ve played any of the other games set in this universe (e.g. Cartographers, Roll Player, …) you’ll feel right at home.
How much time does it take?
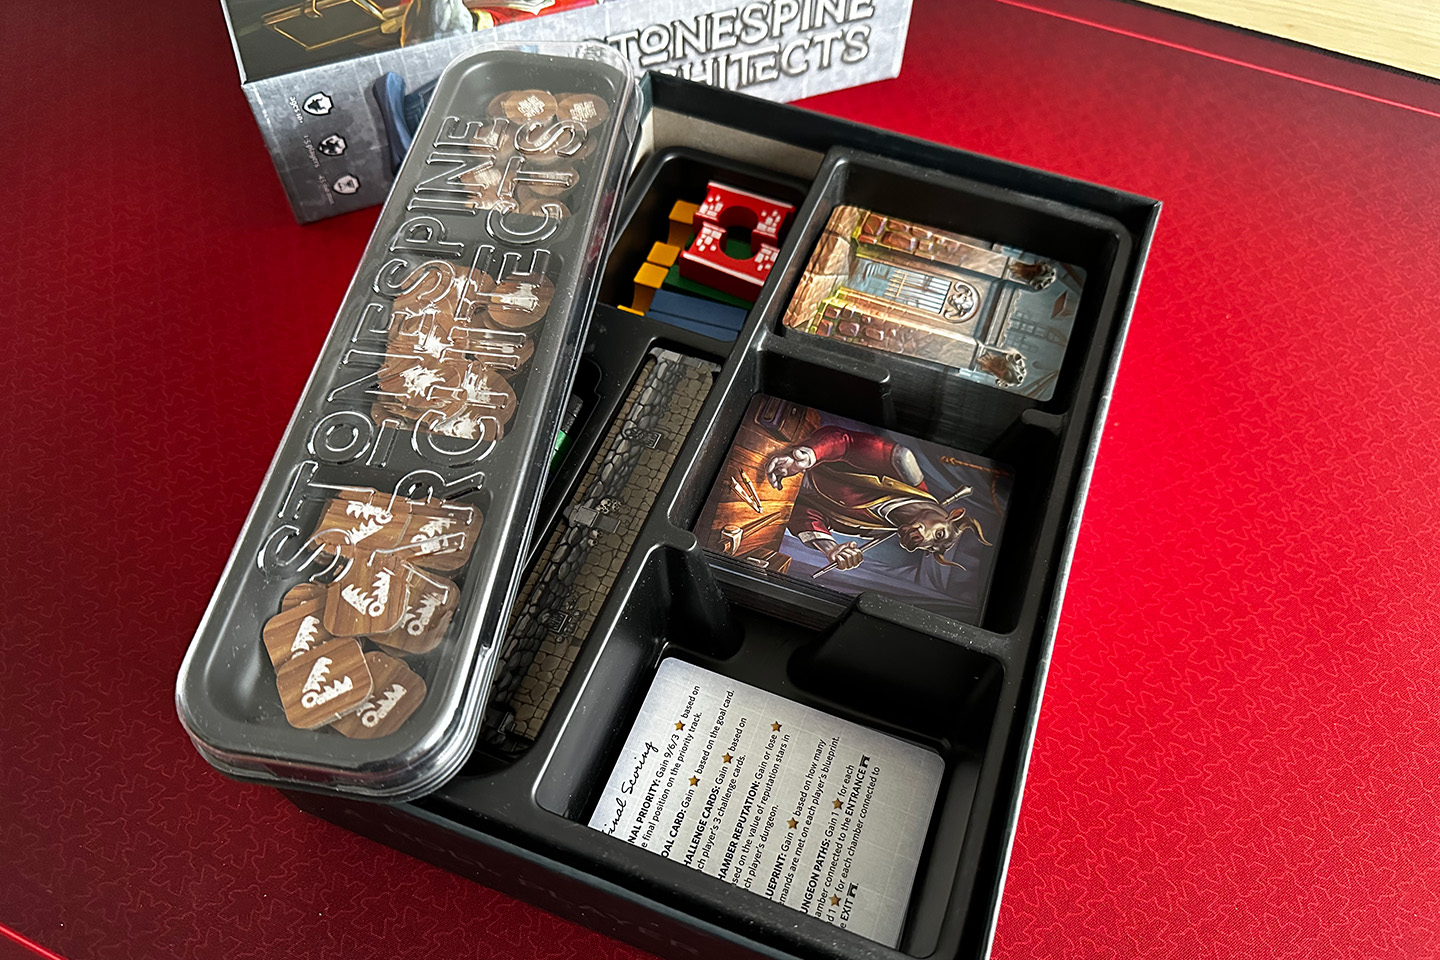
Setting Stonespine Architects up for a solo game and cleaning it back up is super quick thanks to the incredibly useful insert. Everything has it place and is easily accessible. The three different types of tokens go into their own place in the handy removable tray that can be used when playing the game. No messing about with baggies. In less than 5 minutes you are good to go.
I would say a solo game takes me around 45 minutes. Because every round reveals more information about how Jael will score, you can use that knowledge when making decisions about which card to play, which one to keep and which cards will ultimately go to Jael. This might make some turns a bit longer than others, but overall this is a pretty snappy game. Including setup and teardown you’re definitely looking at less than an hour.
What is my verdict?
While on paper this is a very simple game—draft cards and lay them in a 4×4 grid trying to adhere to a specific pattern—there are a lot of little things that turn this seemingly simple formula into a very interesting and fun game to play solo.
For starters, the drafting works really well. Just the fact that you play one card, keep one card for the next round and then draw new cards is so simple yet effective. It strikes an excellent balance between the chance to plan ahead, still seeing a lot of cards, and it having to deal with the unforeseen. What makes this simple system even better is how you know upfront, when looking at your hand of cards, which cards Jael will take after you’ve picked yours. This makes the choices you have to make even more interesting. Do you optimize your own scoring potential, ignoring that of Jael? Or do you try limit Jael’s scoring potential, taking a small hit in your own? So simple, but so fun.
Another thing I really like about this game is the way in which your blueprint, the goal card and the three challenge cards you obtain during the first three rounds give you direction, make all the choices more interesting and offer variety. Just like the drafting, these are all simple, but very effective concepts. What’s fun about the challenges is that you see the three available cards at the start of the round, but you’ll only be able to pick one at the end of the round. This gives you the opportunity to plan and prepare for the card you want to take, and maybe even change how you try to gain gold if you know you’ll have to beat Jael in order to secure the card you have your eye on. The fact that you can start to prepare at the start of the round is especially relevant for the challenge card you take at the end of the third round. Without the potential of upfront preparation you only would have that final fourth round to make use of that challenge card.
The market is another interesting addition to the game. How you can keep on going first when buying stuff as long as you have more gold than Jael forces you to think about the order in which you want to buy things. Do you buy two cheaper things first, but then let Jael pick-up the more expensive tokens that would benefit them a lot? Or do you prioritize the expensive tokens Jael would take?
The combination of things (monsters, traps, treasure chests, …) printed on the chamber cards and the tokens you get from the market to then add to the chambers is yet another mechanism that forces you to make choices and maybe even take a gamble. You might want to discard a card with a monster you need because you don’t want Jael to get it, but that forces you to hope the monster in question shows up on a token in the market. And that you’ll be able to buy it.
As you might be able to tell, I really like this game. Stonespine Architects is, to me at least, a prime example that something can be more than the sum of its parts. All the different aspects of Stonespire Architects—the drafting, the blueprints/goals/challenges, the market, the tokens—are, on their own, all very simple. But added together they morph into a surprisingly thinky and interesting game. The fact that it is pretty to look at, easy to get to the table and rather quick to play make it even better.
Even though I backed Stonespine Architects myself on Kickstarter and it didn’t that long of a turnaround time, I still had kind of forgotten about the game by the time I received the shipping notification. That’s how I managed to get more than pleasantly surprised by a game I bought myself. I’m very happy that the past me decided to back this one!
Score
To make things easier for myself, I use the same scoring categories Board Game Geek uses.
Comments
I'm sorry, I don't support comments on my website. If you want to discuss the game or my review, feel free comment on this dedicated Instagram post or my review on BGG.